


tomaatvk
-
Posts
484 -
Joined
-
Last visited
Reputation Activity
-

 tomaatvk got a reaction from Badomen in the BOX - scratchbuild [FINISHED]
Hello and welcome to the creation of my scratchbuild which is (for now) called "the BOX".
Having built a manner of strange cases previously in an amateurish manner, I felt like it was finally time to try my hands at building something premium (or to what degree that's possible from inside a student room).
A picture of the finished product:
The goal
The goal of this machine is to be a sturdy, not too heavy, as small as possible pc that can house normal ATX motherboards, normal ATX PSUs and have (nearly) all the PCI-e slots free with space for a reasonably chonky gpu (so at least 250+mm length and 150+mm width). It should also be able to house 2 2.5" storage devices, have front 2 USB 3.0 type A (and if possible a front displayport passthrough for my Rift S) and house the 280mm AIO I have lying around. Lastly it should be designed in such a way that it would fit in a modern looking interior without looking too out of place.
The parts
- i7-3770k @ 4.8GHz (delidded with liquid metal, have had it for 5 years)
- MSI GTX 1060 3GB (needed a fan replacement when purchased used)
- Asrock Z77 Extreme 4 (have had it for 5.5 years)
- a stack of 4 ram sticks totalling up to 20GB of 1600MHz DDR3
- Corsair CX450M (non original cables and needed re-pinning)
- Samsung 840 EVO 120GB (have had it for nearly 6 years) and a 360GB 2.5" HDD (from my first laptop, will likely be replaced)
- BeQuiet! Silent Loop 280mm
These parts being so 'janky' made them ideal for a scratchbuild in my mind.
The design
When it comes to designing something sleek and modern looking, the first thought is a box made of black/gray metal and wooden accents (and no gamer-y RGB). To be able to blend in easilly, making it kind of flat rather than tall seemed like a good idea as well.
The design quickly turned into a cleaner, better executed, overhauled version of the current case housing all the above named components (see the picture in the spoiler below), but with the motherboard, gpu and tubing placed inside the case. To stop it from being just a metal box and to allow for 'easy' maintainance on the inside of the case, a detatchable, wooden top plate could be used (instead of just metal). To fit everything including a PSU, the internal height case would need to be increased to 170mm. This would leave a 26mm strip above the radiator making room for the earlier mentioned front I/O. To fit everything within a volume of 170mm*270mm*319mm (the internal volume minus the space for the radiator), the PSU would have to be placed above the CPU area of the motherboard placing heavy restrictions on the space given to the AIO tubing. To not have it still require a height of over 200mm on the inside I would, in fact, also have to replace the current fittings with some right angle fittings (still have some old softtubing bitspower 90° rotary fittings).
Having made up my mind on how it would look I wrote down the dimensions of everything on paper including the locations of all the cuts, holes and bends, the design was pretty much finished. For the people that might be curious, not counting the wooden top panel which still has its details pending on available tools and material, the total volume of the case will be 175*320*320mm (including the feet) which only makes it a 17.92L case making it a small form factor case fitting normal ATX components, decent GPU's and a 280mm radiator.
The construction p.1
Recently having recieved some more decent tools and already having all the aluminium L profile in stock, I already measured out and drilled/sawed these to the required sizes. They'll be used for mounting the top panel to the case as well as stuff like holding the radiator in place. Having tapped all these holes the first screws could already be put into place between a few brackets for the top of the radiator (picture 1 in the spoiler below).
Getting really into the mood to power through this build I also couldn't help getting the metal sheet (galvanized steel, 0.75mm thick) making up the main body of the case already. I even drew the main 2 folds and started to saw it to the correct length, but due to reasonably tight tollerances it's taking quite a bit of time. Me being tired after getting halfway through (picture 2 in the spoiler below) I needed a break which was the ideal moment to write this post.
As of now my plan is to continue working on this case for the next few hours and continue wednesday which is when the next update can be expected (I'll add future updates to the end of this post in this thread as well as make a new post containing the update). If poeple want I can also add a (horrible looking) drawing of the design to clarify the looks a bit more in the next post as I don't currently really have one, only schematic drawings of the unfolded metal. Any opinions or questions, feel free to post those below because I'm really curious about what everyone thinks of it!
UPDATE #1: Part pics and test-fitting
UPDATE #2: Drilling, drilling and more drilling
UPDATE #3: More drilling, but also cutting and more test-fitting
UPDATE #4: Reaching the endgame
#UPDATE 5: Sanding and assembling
UPDATE #6: Getting wood and finishing up
Hopefully you guys enjoyed reading along the adventure of building this case anything close to the ammount of enjoyment I got from building it myself. If anyone has any tips for things I can do to maybe improve this case any further, I'd be glad to hear them. Questions and other remarks are ofcourse welcome too. Thank you all for reading and have a nice day!
-
 tomaatvk got a reaction from DJ46 in the BOX - scratchbuild [FINISHED]
Who would've seen it coming, I got bored this weekend so another small update is here (or that's what I thought but it turned out to be pretty big).
The storage drives
When the case was filled with components I took a look whether it'd be possible to still add another 2.5" drive (as I had one laying around already) on top of the earlier 2.5" and 3.5" drives. Looking around I discovered that right under the 3.5" drive there was some space that wouldn't get used unless I'd be running multi-GPU (which I won't for the forseeable future). Drilling 2 quick holes was all that was required, finishing it off nice and quickly. While the 3 drives fit perfectly, the bigger problem is the cable routing as ofcourse the sata power and sata data cables have to come/go somewhere. With only 2 drives it wasn't all too bad, but with 3 I had to start planning. After a bit of trail and error I discovered a cable routing which seems like a tangled up mess at first glance but actually allows for the drives to be connected without having to put stress on anything. You'll see how I solved it in the pictures later on.
The sanding
With the exposed metal panels slowly gathering scratches from all the manipulating performed on it, it was time to sand the visible parts to the point where they'd be smooth to the point of even having a faded mirror finish. Not realizing how big the surface to be sanded was and how slowly steel is to sand with regular sandpaper, this ofcourse took a little while to say the least. I started witht the front panel to see how far I'd need to go to get a desired finish and it seems I'd need to sand it a whoooole damn lot, stepping through 6 grit levels for every surface.
After complaining a bit about how much work this would be I did start working on it and once I got into the flow it wasn't all too bad. Aside from the occasional irritation from doing the same motions time and time again and the metal dust getting everywhere requiring a lot of cleanup everytime I worked on it, it was actually quite relaxing. I managed to finish the front panel the same evening I started on it (picture 1 below) and the sides of the case took me about 8 hours total. I also mixed the sanding up with a bit of filing to get rid of any leftover sharp edges (pics 2 and 3). Having spent so much time on the finish I was kind of happy with how smooth the exposed metal now feels and looks (aside from the occasinal, barely visible blemish which would've taken about 10 more minutes of sanding each to get rid of them). It's also got the desired faded mirror finish which is demonstrated espesially well on the picture of the front panel (pic 1). A small disadvantage of this finish, it's a fingerprint magnet but I'll live with that, smoothed out steel is luckilly cleanable quite easilly. Having finished all my work on the base sheet this was also the perfect moment to add the feet to the case, 4 furniture feet (pic 4) which work perfectly.
The 'final' assembly
With only the top panel and its mounting being left on the to do list (as well as a possible front panel displayport) it became time for the 'final' assembly as I'd be able to keep it mostly together when mounting said top panel. First a quick look at the sheer ammount of screws (44), standoffs (10), nuts (5) and brackets that are used to put everything together (pic 1). This isn't even counting the 16 screws for the radiator and its fans as well as a small bracket and a single screw used to help support the 3.5" drive's weight.
Starting with the motherboard and the radiator, the case is already half filled (pic 2), but half the work isn't done yet by far as all the complicated stuff still has to come. With the PSU cables being kind of under and inbetween everything, the PSU brackets come next with the PSU right after that (pic 3 and 4). Putting the PSU in the case does reveal one 'big' flaw with the case, the space between the top of the motherboard and the case is so small making it nearly impossible to unclip the CPU power connector (pic 5). The next parts are the expansion cards (GPU, wifi and usb) as well as the front panel. Starting with the expansion cards (pic 6) I do have to note that it's pretty hard to get the GPU in there due to the PSU brackets, but flipping the install order should fix this problem. The front panel was pretty easy as expected (pic 7), but it did pretty much finalize the complete mess that makes up this case's cablemanagement (pic 8) as everything has pretty much no space at all for the cable runs. At last it was time for the harddrive puzzle. First slotting in the 2.5" drives and hooking up the 3.5" drive gives a good picture of how the cables are all run through eachother. After turning the 3.5" drive to it's correct position and properly mounting it finally left me with a complete case (except for the top).
Talking about the top panel, I decided on the kind of wood (oak) and I know where I can find some so I'll go pick that up tomorrow or wednesday depending on the weather. Once I have the wooden panel I'll first try to finish the case and I'll then do an even bigger post sharing info like thermals and noise etc. I do sadly have to admit that I forgot to take any pictures of the current state of the fully assembled build before it turned dark so I'll take those tomorrow and add them below. With the build nearing completion, I'm pretty curious about any opinions people have about the case so please do leave them below!
-
tomaatvk got a reaction from DJ46 in the BOX - scratchbuild [FINISHED]
Short update, but one nonetheless.
The finishing touches on the construction
I had a small list of tasks to do for now, fix the PCI-e bracket which wasn't correctly bent and make the frontpanel. With the PCI-e bracket being easier, that was the thing to start with this morning. After noting how the bracket location needed to change I just started bending bit by bit and checking the new fit. After about 15 minutes I was pretty happy with how it ended up (it's not ideal but it doesn't look crooked anymore and fits properly).
At this point it was time for the big task, creating the front panel which is supposed to go above the radiator. The start was already good as I noticed that when I cut the part yesterday I forgot to cut it to the right length, I only cut it to the right width. To the saw we go. After working a little sweat I managed to saw it to size in one go. Now the next problem, the bends in the base plate of the case aren't extremely clean making it so one side of the side panel is supposed to be ~2mm thinner than the other size. With the error being so small I could only fix this by filing, but filing down steel doesn't go that quick. I think it took me a full hour to file down the whole thing to a somewhat good size.
Having the front panel down to the correct size, it's time for some holes to mount everything, This time the hole count is only 5 so that went relatively quick. This left a pretty roughed up front panel, but at some point down the line I'll clean it up a bit (pic 1 below). Mounting the USB ports and the power button does make it feel like a propper font panel (ignoring the slightly too large usb cutouts, see pic 2 below). The last thing left to do is to solder the wires to the power button and drill 2 more holes in the case to mount the panel to the case which luckilly went without any issues (pic 3).
The planning for the finish
Now that all metal sheets are pretty much finished when it comes to bending/drilling/cutting (aside from mounting points for the top panel and holes for a possible second 2.5" drive), it's time to plan the finish I'll apply to the sheets and decide on the wooden top sheet I want. For the metal finish I'll probably just sand it to a mirror finish. For the top panel, I'm currently thinking of going for an oak sheet that'll have an overhang of a few centimeters all around the case but who knows, maybe someone has a better suggestion. I'll probably start sanding somewhere tonight but any further major progress will probably not happen until early next week. I might share a mini update to show how the mirror finish looks on the first part I've finished. For now though, it's time to show off how it currently looks. One thing that kept suprising me everytime I put it together is its weight, looking at the size of the thing you don't really expect it to have the same weight as most normal pc's which are about 2.5 times its volume.
-
 tomaatvk got a reaction from Hairless Monkey Boy in the BOX - scratchbuild [FINISHED]
Short update, but one nonetheless.
The finishing touches on the construction
I had a small list of tasks to do for now, fix the PCI-e bracket which wasn't correctly bent and make the frontpanel. With the PCI-e bracket being easier, that was the thing to start with this morning. After noting how the bracket location needed to change I just started bending bit by bit and checking the new fit. After about 15 minutes I was pretty happy with how it ended up (it's not ideal but it doesn't look crooked anymore and fits properly).
At this point it was time for the big task, creating the front panel which is supposed to go above the radiator. The start was already good as I noticed that when I cut the part yesterday I forgot to cut it to the right length, I only cut it to the right width. To the saw we go. After working a little sweat I managed to saw it to size in one go. Now the next problem, the bends in the base plate of the case aren't extremely clean making it so one side of the side panel is supposed to be ~2mm thinner than the other size. With the error being so small I could only fix this by filing, but filing down steel doesn't go that quick. I think it took me a full hour to file down the whole thing to a somewhat good size.
Having the front panel down to the correct size, it's time for some holes to mount everything, This time the hole count is only 5 so that went relatively quick. This left a pretty roughed up front panel, but at some point down the line I'll clean it up a bit (pic 1 below). Mounting the USB ports and the power button does make it feel like a propper font panel (ignoring the slightly too large usb cutouts, see pic 2 below). The last thing left to do is to solder the wires to the power button and drill 2 more holes in the case to mount the panel to the case which luckilly went without any issues (pic 3).
The planning for the finish
Now that all metal sheets are pretty much finished when it comes to bending/drilling/cutting (aside from mounting points for the top panel and holes for a possible second 2.5" drive), it's time to plan the finish I'll apply to the sheets and decide on the wooden top sheet I want. For the metal finish I'll probably just sand it to a mirror finish. For the top panel, I'm currently thinking of going for an oak sheet that'll have an overhang of a few centimeters all around the case but who knows, maybe someone has a better suggestion. I'll probably start sanding somewhere tonight but any further major progress will probably not happen until early next week. I might share a mini update to show how the mirror finish looks on the first part I've finished. For now though, it's time to show off how it currently looks. One thing that kept suprising me everytime I put it together is its weight, looking at the size of the thing you don't really expect it to have the same weight as most normal pc's which are about 2.5 times its volume.
-
tomaatvk got a reaction from Hairless Monkey Boy in the BOX - scratchbuild [FINISHED]
Hello and welcome to the creation of my scratchbuild which is (for now) called "the BOX".
Having built a manner of strange cases previously in an amateurish manner, I felt like it was finally time to try my hands at building something premium (or to what degree that's possible from inside a student room).
A picture of the finished product:
The goal
The goal of this machine is to be a sturdy, not too heavy, as small as possible pc that can house normal ATX motherboards, normal ATX PSUs and have (nearly) all the PCI-e slots free with space for a reasonably chonky gpu (so at least 250+mm length and 150+mm width). It should also be able to house 2 2.5" storage devices, have front 2 USB 3.0 type A (and if possible a front displayport passthrough for my Rift S) and house the 280mm AIO I have lying around. Lastly it should be designed in such a way that it would fit in a modern looking interior without looking too out of place.
The parts
- i7-3770k @ 4.8GHz (delidded with liquid metal, have had it for 5 years)
- MSI GTX 1060 3GB (needed a fan replacement when purchased used)
- Asrock Z77 Extreme 4 (have had it for 5.5 years)
- a stack of 4 ram sticks totalling up to 20GB of 1600MHz DDR3
- Corsair CX450M (non original cables and needed re-pinning)
- Samsung 840 EVO 120GB (have had it for nearly 6 years) and a 360GB 2.5" HDD (from my first laptop, will likely be replaced)
- BeQuiet! Silent Loop 280mm
These parts being so 'janky' made them ideal for a scratchbuild in my mind.
The design
When it comes to designing something sleek and modern looking, the first thought is a box made of black/gray metal and wooden accents (and no gamer-y RGB). To be able to blend in easilly, making it kind of flat rather than tall seemed like a good idea as well.
The design quickly turned into a cleaner, better executed, overhauled version of the current case housing all the above named components (see the picture in the spoiler below), but with the motherboard, gpu and tubing placed inside the case. To stop it from being just a metal box and to allow for 'easy' maintainance on the inside of the case, a detatchable, wooden top plate could be used (instead of just metal). To fit everything including a PSU, the internal height case would need to be increased to 170mm. This would leave a 26mm strip above the radiator making room for the earlier mentioned front I/O. To fit everything within a volume of 170mm*270mm*319mm (the internal volume minus the space for the radiator), the PSU would have to be placed above the CPU area of the motherboard placing heavy restrictions on the space given to the AIO tubing. To not have it still require a height of over 200mm on the inside I would, in fact, also have to replace the current fittings with some right angle fittings (still have some old softtubing bitspower 90° rotary fittings).
Having made up my mind on how it would look I wrote down the dimensions of everything on paper including the locations of all the cuts, holes and bends, the design was pretty much finished. For the people that might be curious, not counting the wooden top panel which still has its details pending on available tools and material, the total volume of the case will be 175*320*320mm (including the feet) which only makes it a 17.92L case making it a small form factor case fitting normal ATX components, decent GPU's and a 280mm radiator.
The construction p.1
Recently having recieved some more decent tools and already having all the aluminium L profile in stock, I already measured out and drilled/sawed these to the required sizes. They'll be used for mounting the top panel to the case as well as stuff like holding the radiator in place. Having tapped all these holes the first screws could already be put into place between a few brackets for the top of the radiator (picture 1 in the spoiler below).
Getting really into the mood to power through this build I also couldn't help getting the metal sheet (galvanized steel, 0.75mm thick) making up the main body of the case already. I even drew the main 2 folds and started to saw it to the correct length, but due to reasonably tight tollerances it's taking quite a bit of time. Me being tired after getting halfway through (picture 2 in the spoiler below) I needed a break which was the ideal moment to write this post.
As of now my plan is to continue working on this case for the next few hours and continue wednesday which is when the next update can be expected (I'll add future updates to the end of this post in this thread as well as make a new post containing the update). If poeple want I can also add a (horrible looking) drawing of the design to clarify the looks a bit more in the next post as I don't currently really have one, only schematic drawings of the unfolded metal. Any opinions or questions, feel free to post those below because I'm really curious about what everyone thinks of it!
UPDATE #1: Part pics and test-fitting
UPDATE #2: Drilling, drilling and more drilling
UPDATE #3: More drilling, but also cutting and more test-fitting
UPDATE #4: Reaching the endgame
#UPDATE 5: Sanding and assembling
UPDATE #6: Getting wood and finishing up
Hopefully you guys enjoyed reading along the adventure of building this case anything close to the ammount of enjoyment I got from building it myself. If anyone has any tips for things I can do to maybe improve this case any further, I'd be glad to hear them. Questions and other remarks are ofcourse welcome too. Thank you all for reading and have a nice day!
-
tomaatvk got a reaction from DJ46 in the BOX - scratchbuild [FINISHED]
That's just how we roll. Also, it's time for another update!
The construction p.3
Being bored I decided it was already time to continue working after only a short break. The next point on the agenda was the PCI-e, PSU and frontpanel steel plates. Remembering the nightmares of trying to saw through the panel from the first update (took me about 45 seconds for 1cm) I turned to my dremel to speed up the process to the dismay of my roommates. Having already previously measured the required dimensions of these plates I was at least able to finish all the cutting in about half an hour. After another about half an hour of filing the sheets to the point where they couldn't be considered lethal weapons anymore and removing all the burnt tape I was left with pretty much what I wanted (pic 1 below).
Having finished the cutting, the next steps were bending (pic 2 below), drilling and once again testfitting. Having almost doubled the number of holes drilled previously I'm kinda getting tired of drilling but at least we have picture 3 and 4 to show for it. Small explanation, the motherboard standoffs on the right of picture 4 serve to clamp expansion cards whenever there is a screw added (pic 5).
The test-fit p.2
Having finished all brackets used to mount parts except for the front panel which will house 2 usb ports and a power button it was time for another test fit to see if everything still works as expected. Having already mounted the motherboard for testing the expansion card brackets, I already have a head start. The next part which doesn't go over top a lot of stuff is the radiator so that'll be the next part to mount leaving me with pic 1 below. At this point the pc is already getting kinds filled but it needs to go further!
Everything from here on out is basicly a puzzle but with the PSU cables probably being hell to cablemange in this case (read: get in there at all), I decided to continue with that. Manouvering the 8 pin and 24 pin into their connectors through the AIO tubing was suprisingly easy (only taking a few minutes). The next, and for now last, step is to somehow get cables to my drives which are next to be mounted. Laying down the cables first and then mounting the drives worked in the end eventhough the sata data cables are kind of struggling with eachother.
This left me with a small box filled with basicly a whole pc without a top and front panel. A bit of showing off is ofcourse required at this point, see pictures 2, 3 and 4 below for how it currently looks and notice how damn filled box is at this point (except for the space between the PSU and GPU for whatever reason. One thing I'd rather you not notice is how the PCI-e bracket is bent, I kinda didn't take the curvature of the metal into account when sawing this part although this is probably fixable with a bit more bending, maybe some drilling and (who knew) it might even require some more sawing/cutting.
At this point my body is pretty much worn out for the day so this'll be the last update today. All I'll still do is try to see if the parts still work (if I can manage to reach the onboard power button). I'm genuently really surprised by how much progress I managed to make today. One thing I did realize while typing this post is that I really need to clean my room, having done everything except for using the dremel inside it kinda left the table area covered with metal dust (which is why the pc is on the floor). A second thing I'm realizing while typing this is that the stores are almost closing for the day so I'd better go. Next update will be tomorrow when I'll have fixed the PCI-e bracket and finished the front panel.
-
 tomaatvk got a reaction from akio123008 in the BOX - scratchbuild [FINISHED]
Update time
The construction p.2
Waking up today I knew what was ahead of me, drilling, drilling, a bit of deburring and more drilling. It started off with drilling the already marked holes for the radiator and one of the two PSU bracket and ofcourse testing if it fit, which it did, like a glove (pic 1 below has the radiator only).
At this point I had to debate whether to mount the drives or the motherboard first and considering the motherboard is significantly more complex (smaller tollerances, more holes, you know the drill) I started with this. I taped up the whole bottom of the case so it wouldn't short anything while doublechecking, took out the BIOS battery as well and started drawing, drilling and tapping hole after hole. Suprisingly, eventhough I have to put some screws in halfway first, all holes aligned and it was time to mount the motherboard for a quick test fit (pic 2 below has the motherboard and the first PSU bracket).
Having filled the case quite a bit already it was time for the drives. As aluded to in my second update, I'll try to mount both a 3.5" and 2.5" drive. To still allow for brackets for the top plate and expansion cards of a decent width, the 3.5" drive had to kind of overhang a little bit of the radiator (allowing me to also make use of the radiator to support the weight of the drive) which made it a little bit more complex. After about 15 minutes of measuring and drawing I was confident I had the hole spacing down and as it turns out I did once again. Measure twice (or ten times) drill once really does come in helpful. I was even able to leave space to add rubber rings for noise dampening later on.
While fitting the 3.5" drive I also decided to test whether the AIO was actually mountable on the CPU without changing out the fitting (as the tubes collide with the PSU which will go right above the CPU). As it turns out, my PSU was the max length which still fit the original tubing/fitting configuration. FYI, the original plan was to add some softtubing fittings as described in the original post, but that would leave a big mess. This allowed me to test fit the build with most components in place (see pic 3 below, for clarity I left out the expansion cards).
Eventhough I don't have any more pictures I didn't add yet, I also drilled and testfitted the 2.5" drive and recieved the power switch. Later this afternoon I'll most likely start working on the second PSU bracket which would finally allow me to boot the computer and see if I didn't kill anything. If I've made any progress by this evening, another update can ofcourse be expected.
-
tomaatvk got a reaction from DJ46 in the BOX - scratchbuild [FINISHED]
Hello and welcome to the creation of my scratchbuild which is (for now) called "the BOX".
Having built a manner of strange cases previously in an amateurish manner, I felt like it was finally time to try my hands at building something premium (or to what degree that's possible from inside a student room).
A picture of the finished product:
The goal
The goal of this machine is to be a sturdy, not too heavy, as small as possible pc that can house normal ATX motherboards, normal ATX PSUs and have (nearly) all the PCI-e slots free with space for a reasonably chonky gpu (so at least 250+mm length and 150+mm width). It should also be able to house 2 2.5" storage devices, have front 2 USB 3.0 type A (and if possible a front displayport passthrough for my Rift S) and house the 280mm AIO I have lying around. Lastly it should be designed in such a way that it would fit in a modern looking interior without looking too out of place.
The parts
- i7-3770k @ 4.8GHz (delidded with liquid metal, have had it for 5 years)
- MSI GTX 1060 3GB (needed a fan replacement when purchased used)
- Asrock Z77 Extreme 4 (have had it for 5.5 years)
- a stack of 4 ram sticks totalling up to 20GB of 1600MHz DDR3
- Corsair CX450M (non original cables and needed re-pinning)
- Samsung 840 EVO 120GB (have had it for nearly 6 years) and a 360GB 2.5" HDD (from my first laptop, will likely be replaced)
- BeQuiet! Silent Loop 280mm
These parts being so 'janky' made them ideal for a scratchbuild in my mind.
The design
When it comes to designing something sleek and modern looking, the first thought is a box made of black/gray metal and wooden accents (and no gamer-y RGB). To be able to blend in easilly, making it kind of flat rather than tall seemed like a good idea as well.
The design quickly turned into a cleaner, better executed, overhauled version of the current case housing all the above named components (see the picture in the spoiler below), but with the motherboard, gpu and tubing placed inside the case. To stop it from being just a metal box and to allow for 'easy' maintainance on the inside of the case, a detatchable, wooden top plate could be used (instead of just metal). To fit everything including a PSU, the internal height case would need to be increased to 170mm. This would leave a 26mm strip above the radiator making room for the earlier mentioned front I/O. To fit everything within a volume of 170mm*270mm*319mm (the internal volume minus the space for the radiator), the PSU would have to be placed above the CPU area of the motherboard placing heavy restrictions on the space given to the AIO tubing. To not have it still require a height of over 200mm on the inside I would, in fact, also have to replace the current fittings with some right angle fittings (still have some old softtubing bitspower 90° rotary fittings).
Having made up my mind on how it would look I wrote down the dimensions of everything on paper including the locations of all the cuts, holes and bends, the design was pretty much finished. For the people that might be curious, not counting the wooden top panel which still has its details pending on available tools and material, the total volume of the case will be 175*320*320mm (including the feet) which only makes it a 17.92L case making it a small form factor case fitting normal ATX components, decent GPU's and a 280mm radiator.
The construction p.1
Recently having recieved some more decent tools and already having all the aluminium L profile in stock, I already measured out and drilled/sawed these to the required sizes. They'll be used for mounting the top panel to the case as well as stuff like holding the radiator in place. Having tapped all these holes the first screws could already be put into place between a few brackets for the top of the radiator (picture 1 in the spoiler below).
Getting really into the mood to power through this build I also couldn't help getting the metal sheet (galvanized steel, 0.75mm thick) making up the main body of the case already. I even drew the main 2 folds and started to saw it to the correct length, but due to reasonably tight tollerances it's taking quite a bit of time. Me being tired after getting halfway through (picture 2 in the spoiler below) I needed a break which was the ideal moment to write this post.
As of now my plan is to continue working on this case for the next few hours and continue wednesday which is when the next update can be expected (I'll add future updates to the end of this post in this thread as well as make a new post containing the update). If poeple want I can also add a (horrible looking) drawing of the design to clarify the looks a bit more in the next post as I don't currently really have one, only schematic drawings of the unfolded metal. Any opinions or questions, feel free to post those below because I'm really curious about what everyone thinks of it!
UPDATE #1: Part pics and test-fitting
UPDATE #2: Drilling, drilling and more drilling
UPDATE #3: More drilling, but also cutting and more test-fitting
UPDATE #4: Reaching the endgame
#UPDATE 5: Sanding and assembling
UPDATE #6: Getting wood and finishing up
Hopefully you guys enjoyed reading along the adventure of building this case anything close to the ammount of enjoyment I got from building it myself. If anyone has any tips for things I can do to maybe improve this case any further, I'd be glad to hear them. Questions and other remarks are ofcourse welcome too. Thank you all for reading and have a nice day!
-
.png.8f60cc6df2cefee7b1ee5519d74b7bf0.thumb.png.1ff7cb82fc22a225a88a32f46f488c33.png) tomaatvk got a reaction from Meganter in the BOX - scratchbuild [FINISHED]
tomaatvk got a reaction from Meganter in the BOX - scratchbuild [FINISHED]
Hello and welcome to the creation of my scratchbuild which is (for now) called "the BOX".
Having built a manner of strange cases previously in an amateurish manner, I felt like it was finally time to try my hands at building something premium (or to what degree that's possible from inside a student room).
A picture of the finished product:
The goal
The goal of this machine is to be a sturdy, not too heavy, as small as possible pc that can house normal ATX motherboards, normal ATX PSUs and have (nearly) all the PCI-e slots free with space for a reasonably chonky gpu (so at least 250+mm length and 150+mm width). It should also be able to house 2 2.5" storage devices, have front 2 USB 3.0 type A (and if possible a front displayport passthrough for my Rift S) and house the 280mm AIO I have lying around. Lastly it should be designed in such a way that it would fit in a modern looking interior without looking too out of place.
The parts
- i7-3770k @ 4.8GHz (delidded with liquid metal, have had it for 5 years)
- MSI GTX 1060 3GB (needed a fan replacement when purchased used)
- Asrock Z77 Extreme 4 (have had it for 5.5 years)
- a stack of 4 ram sticks totalling up to 20GB of 1600MHz DDR3
- Corsair CX450M (non original cables and needed re-pinning)
- Samsung 840 EVO 120GB (have had it for nearly 6 years) and a 360GB 2.5" HDD (from my first laptop, will likely be replaced)
- BeQuiet! Silent Loop 280mm
These parts being so 'janky' made them ideal for a scratchbuild in my mind.
The design
When it comes to designing something sleek and modern looking, the first thought is a box made of black/gray metal and wooden accents (and no gamer-y RGB). To be able to blend in easilly, making it kind of flat rather than tall seemed like a good idea as well.
The design quickly turned into a cleaner, better executed, overhauled version of the current case housing all the above named components (see the picture in the spoiler below), but with the motherboard, gpu and tubing placed inside the case. To stop it from being just a metal box and to allow for 'easy' maintainance on the inside of the case, a detatchable, wooden top plate could be used (instead of just metal). To fit everything including a PSU, the internal height case would need to be increased to 170mm. This would leave a 26mm strip above the radiator making room for the earlier mentioned front I/O. To fit everything within a volume of 170mm*270mm*319mm (the internal volume minus the space for the radiator), the PSU would have to be placed above the CPU area of the motherboard placing heavy restrictions on the space given to the AIO tubing. To not have it still require a height of over 200mm on the inside I would, in fact, also have to replace the current fittings with some right angle fittings (still have some old softtubing bitspower 90° rotary fittings).
Having made up my mind on how it would look I wrote down the dimensions of everything on paper including the locations of all the cuts, holes and bends, the design was pretty much finished. For the people that might be curious, not counting the wooden top panel which still has its details pending on available tools and material, the total volume of the case will be 175*320*320mm (including the feet) which only makes it a 17.92L case making it a small form factor case fitting normal ATX components, decent GPU's and a 280mm radiator.
The construction p.1
Recently having recieved some more decent tools and already having all the aluminium L profile in stock, I already measured out and drilled/sawed these to the required sizes. They'll be used for mounting the top panel to the case as well as stuff like holding the radiator in place. Having tapped all these holes the first screws could already be put into place between a few brackets for the top of the radiator (picture 1 in the spoiler below).
Getting really into the mood to power through this build I also couldn't help getting the metal sheet (galvanized steel, 0.75mm thick) making up the main body of the case already. I even drew the main 2 folds and started to saw it to the correct length, but due to reasonably tight tollerances it's taking quite a bit of time. Me being tired after getting halfway through (picture 2 in the spoiler below) I needed a break which was the ideal moment to write this post.
As of now my plan is to continue working on this case for the next few hours and continue wednesday which is when the next update can be expected (I'll add future updates to the end of this post in this thread as well as make a new post containing the update). If poeple want I can also add a (horrible looking) drawing of the design to clarify the looks a bit more in the next post as I don't currently really have one, only schematic drawings of the unfolded metal. Any opinions or questions, feel free to post those below because I'm really curious about what everyone thinks of it!
UPDATE #1: Part pics and test-fitting
UPDATE #2: Drilling, drilling and more drilling
UPDATE #3: More drilling, but also cutting and more test-fitting
UPDATE #4: Reaching the endgame
#UPDATE 5: Sanding and assembling
UPDATE #6: Getting wood and finishing up
Hopefully you guys enjoyed reading along the adventure of building this case anything close to the ammount of enjoyment I got from building it myself. If anyone has any tips for things I can do to maybe improve this case any further, I'd be glad to hear them. Questions and other remarks are ofcourse welcome too. Thank you all for reading and have a nice day!
-

 tomaatvk got a reaction from minibois in Dutch Talk
Ik heb mijn soldeertin en soldeerbout gewoon bij de gamma gehaald, niet het beste spul maar goedkoop en t doet zn werk. Als je echt alleen maar hier en daar cru wat draadjes aan elkaar plakt en niet te veel met PCB's gaat werken gaat dat gewoon goed. Als je iets complexer spul zoekt kan ik je al niet meer helpen.
-

 tomaatvk got a reaction from Enderman in Intel Core i9-9900K 8 Core/16 Thread CPU Listed For Preorder at 560 Euros, Core i7-9700K 8 Core/8 Thread For 440 Euro
It may sound ridiculously low for an i7 at first glance, but realise that this gen an i7 isn't their best consumer chip anymore, the i9 has taken over the spot of the i7 reducing the value of the i7 chip.
-
tomaatvk got a reaction from minibois in Netherlands Gaming Authority finds 4 out of 10 Lootboxes are illegal
Damn, that's a really bogus translation as game is way to broad of a translation for gambling specific games. I'm genuently supprised.
Aside from naming, I do hope this controversy does calm the huge shift towards lootboxes in regular games. Be it because they stop the selling of the items in it and thus making people less interested in buying them and thus less profitable (so less reason to implement) or just because they want to stay away from it.
-
 tomaatvk got a reaction from Wauthar in Dutch Talk
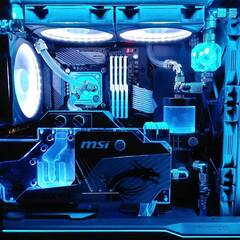
Afgelopen week naar een lanparty gegaan, heb een prachtige pic van mn pc eraan overgehouden:
Daarnaast heb ik ook nog n vraagje voor mensen hier die uit huis zijn, ik krijg over ongeveer een week de sleutels van mijn kamer waar ik naar ga verhuizen, maar hoe gaan jullie om met lanparty's in de buurt van het ouderlijk huis en niet je studentenkamer waar dan je desktop staat? Sta nu zelf namelijk voor dit dilemma. Als iemand trouwens nog tips heeft over het inrichten van een kamer of het kopen van meubels in de buurt van Eindhoven zijn die zeker welkom.
-
 tomaatvk reacted to rjfaber91 in Dutch Talk
Als Gelderlander vermijd ik Hollandse woorden zoveel mogelijk. Ik praat liever Nederlands.
-
tomaatvk reacted to dizmo in Is this for real?
True, but that's not the case here
People that buy them saying "oh I'll just get my money back from Paypal if it's fake" are the worst IMO. They're only amplifying the problem.
I wish they could be punished somehow. Not a popular view, but one I hold nonetheless.
-
tomaatvk reacted to mr moose in Kim Dotcom: I'm suing NZ Govt for billions
Aside the fact he does not fit into any of that criteria, an NZ judge has already ruled that the search warrant (they did have one) was too broad and did not contain enough reasoning to justify the seizure of property. An NZ judge has also ruled that no one had the authority to spy on him or tap his house, which is why he is allowed to sue them. In other words the police and investigators both over stepped the power of the warrant they were issued and were spying on him without proper approval.
This is grouse misuse of power. Such actions do not lead to a good place.
-
 tomaatvk got a reaction from WoodenMarker in Improving fan efficiency by reducing the tip gap.
If I'm not mistaken, this has to do with how, when the fan ages, the blades warp ever so slightly increasing their radius. This in turn would make the gap you see as a problem shrink. As a fan manufacturer you wouldn't want your fans killing themselves by letting the blades scrape the housing, so you increase the gap a litle bit to account for the increase in blade size over the lifespan of the fan. This was even said in either an LTT or a gamers nexus video if I recall correctly.
-
 tomaatvk got a reaction from WereCat in Improving fan efficiency by reducing the tip gap.
If I'm not mistaken, this has to do with how, when the fan ages, the blades warp ever so slightly increasing their radius. This in turn would make the gap you see as a problem shrink. As a fan manufacturer you wouldn't want your fans killing themselves by letting the blades scrape the housing, so you increase the gap a litle bit to account for the increase in blade size over the lifespan of the fan. This was even said in either an LTT or a gamers nexus video if I recall correctly.
-
tomaatvk reacted to GirlFromYonder in Lesson learned boys (and girls) don't date crazy
WHAT A FUCKING BITCH.
Go to the police and report her for vandalism
-
 tomaatvk got a reaction from rjfaber91 in Dutch Talk
Verveelde me vandaag een beetje, heb me uiteindelijk een mini-koelkastje gebouwd uit wat piepschuim, een blokje hout, een peltier element, 2 oude CPU koelers (een die voor dit soort doeleinden was en een die van een oude pentium 4 pc komt) en 2 fans.
Hij werkt goed. Ik kan varrieren tussen 150, 70 en 35 watt stroomgebruik waarbij 150 watt eigenlijk alleen nuttig is tijdens het afkoelen zelf, 70 watt is handig voor dat laatste beetje bijkoelen als die al koud is en 35 is gewoon om temperatuur vast te houden. Als je dit vergelijkt met andere koelkasten is dat ding dus best zuinig. Bij die 35W stand haalt die de 4°C en bij die 70W stand haalt die zelf de 2°C (bij de 150W stand heeft die hetzelfde omdat hij dan minder efficient is). Er is in totaal een ruimte in van 188*188*335mm (L*B*H) met op sommige plekken een hoogte van 355mm (genoeg voor 8 flesjes bier naast elkaar op de bodem, maar een 1.5L fles past er ook net in).
Ga er komende dagen ergens waarschijnlijk nog een thermometertje op zetten die de temperatuur binnen in dat ding moet meter en dat dan op een LED schermpje laat zien. Hij werkt overigens op 12/7/5V dus een computer voeding is daar perfect voor. Hij hangt atm nog aan mijn pc, maar ik ga er binnenkort ook een aparte voeding op aansluiten zodat het een stand alone unit wordt.
Niet te vergeten, hij is ook best gvd stil ook, beide fans die er in zitten draaien namelijk op 7V en voor de rest zitten er geen geluid producerende voorwerpen op/aan.
Als iemand interesse heeft in foto's oid, zeg ff.
-
 tomaatvk got a reaction from Input_Name_Here in What is TDP in terms of heat output? Can you convert the measurement of TDP into something like Joules per second, or minute?
TDP is used to indicate the amount of heat that the component in question could produce in the worst condition. Different companies do use TDP in different ways. For example:
intel's TDP is the amount of heat the worst binned chip could produce when put through the worst kind of torture (at stock settings ofcourse), while most intel chips could not even come close to the TDP they are rated at.
Nvidia GPU chips are a whole different story, they use TDP in such a way that the indicated TDP is the maximum amount of power it is allowed to pull. If the chip wants to pull more, it will get throttled to the point where it will maintain its TDP value.
I have no idea how it works with AMD CPU's, but I guess it works the same as with intel CPU's.
AMD GPU's are the same as Nvidia GPU's, but they key difference is that Nvidia's TDP is for the whole card while AMD only indicates the amount of power the silicon uses.
TDP is always just the amount of power, measured it watts (which is the same as joules per second), the part could consume. When we talk about computer parts, basicly all the energy goes into either movement of air/fans/HDD platters, light, sound and heat output. As you may guess, a CPU does not move a fan or produce light, etc. so pretty much all the power a CPU will consume will get transfered into heat.
To conclude, for your example of the 3930k. If it would consume and produce 130 watts of heat if it would work at 100% and be one of the worst chips sold. This is at the condition that it is not overclocked.
-
tomaatvk reacted to ProjectBox153 in Did Youtube Change Its Look Again?
Click your user icon in the top right corner and choose "Restore old YouTube" at the bottom.
-
 tomaatvk got a reaction from Principis in Dutch Talk
Heb de afgelopen dagen nog even zitten knutselen aan mn pc en hij ziet er echt gewoon als herboren uit. Heb enkele stukken tubing opnieuw gedaan zodat het er cleaner uitziet, meer RGB LEDs erin gezet (ze staan eigenlijk altijd op blauw of uit, maar het gaat om het idee), wat cable management gedaan, hier en daar wat dingetjes opgepoetst, geluidskaart toegevoegd (die je niet ziet aangezien die vlak achter mn gpu zit), de PCI-e 1x riser cable van mn geluidskaart helemaal ingetaped in zwarte tape zodat hij niet meer lelijk is, enz. Hieronder wat foto's van hoe die er nu uit ziet. Blijkbaar is het ook een ding dat als je leds redelijk uniform op een rooster schijnt dat het er redelijk cool uitziet, aldus de laatste foto, die is van de achterkant.
Mijn toekomstige plannen zijn om de PCI-e 16x riser cable van mijn GPU te vervangen door eentje die wel PCI-e 3.0 support i.p.v. 2.0 op de huidige (ik zit al op 8x dus 3.0 is dan wel fijn). Ik wilde ook de zilveren stop fittingen van EK die op de GPU en res zitten vervangen door mooie zwarte van bitspower, er custom sleeved cables in zetten en mss nog een klein 5" scherm voor mijn PSU hangen met system parameters (is een gebruikelijke mod bij deze case). Ook moet ik nog ff wat extra schroefjes in de achterkant zetten, mss een grotere buis voor mijn res halen en hier en daar wat dingen verstevigen voor het geval dat.
Ben benieuwd wat jullie er van vinden.
-
 tomaatvk got a reaction from mikat in Dutch Talk
Rip dit, zou dus morgen de laatste spullen voor waterkoeling binnenkrijgen zodat ik zou kunnen gaan bouwen, blijkt vandaag de pci-e riser cable van mijn thermaltake core p3 voor de 2e keer binnen driekwart jaar kapot te zijn. Wat is dit voor een onzin. Ga me morgen gewoon eindelijk een andere bestellen en dat is dan maar €30 weg, heb dan tenminste een fatsoenlijk product.
Zodra dat ding binnen is (wss donderdag) zullen er wel foto's online komen van de upgrade.
Hoe zit het nou eigenlijk met jouw build log van je nieuwe pc @Minibois?


.png.8f60cc6df2cefee7b1ee5519d74b7bf0.thumb.png.1ff7cb82fc22a225a88a32f46f488c33.png)


