


NavyChief
-
Posts
113 -
Joined
-
Last visited


NavyChief's Achievements
")
-

Monolithic 500D - Corsair Obsidian 500D Build Log
NavyChief replied to NavyChief's topic in Build Logs
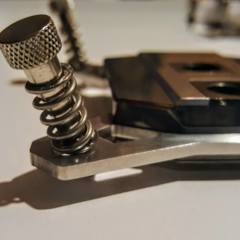
I have all the 500D case components disassembled. All of the SSD and HDD trays have been removed. The top and front panel radiator/fan mounts have been removed also. The two tempered glass panels have been removed. The case is bare and ready for components. Here is a photo of the three SSD mounts, two HDD mounts and the back panel channel used to hide cabling. These are the two stock 120mm fans that are included with the unit. One is factory mounted at the front and the other at the rear. The instruction manual for the 500D is fairly straightforward. Ignore the HDD LED cable that is pictured on page 15 of this manual, the unit does not have this cable. I decided to use a Corsair AX1200i that was sitting in a previous build. Love the modular nature of these power supplies. For the top exhaust, I decided to go with two Corsair LL140 RGB 140mm fans. The 120mm fans would have been sufficient but I wanted something that would fill the top panel more fully and evenly. Here is a shot of the two LL140 fans mounted on the top radiator shelf and placed into the case. These beefy fans fill the space nicely and will exhaust plenty of air from the case. I decided on the Gigabyte Z370 Aorus Gaming 7 ATX motherboard. It provides all the connections that I will be needing, especially the numerous M.2 ports. For the CPU, I decided on the unlocked Intel Core i7-8700K LGA1151 processor. This is an 8th generation 6-core 3.7 GHz (4.7 GHz Turbo) model with 12MB of L3 cache and only 95W of thermal design power. The motherboard has a clean black, silver and white color scheme. The i7-8700K processor slots cleanly into the socket and is ready for the AIO cooler. For the main drive I went with a 500GB Samsung 960 EVO M.2. This drive will hold the Windows 10 Pro operating system as well as all the other non-gaming programs that I will be using. Here is the 500GB M.2 installed on the motherboard in the upper M.2 position. This slot has a removable heatshield to provide thermal protection for this M.2. This 1TB Samsung 960 EVO M.2 will serve as my gaming drive. The large storage capacity should easily hold all of my Steam, Origin, Blizzard, Uplay and Epic games. I used a black EKWB M.2 NVMe Heatsink to provide thermal protection for the gaming M.2. Very easy to install and looks outstanding! They also offer this heatsink in nickel, gold, green, red and purple. Here it is mounted in the second M.2 position. You can see the removable thermal shield for the upper M.2 covering the 500GB M.2 unit. Once all the M.2 drives have been mounted, I can now install the motherboard into the 500D chassis. This case provides plenty of internal room for all types of components. The black and silver motherboard color scheme matches perfectly with the 500D case colors. I selected a pair of 500GB Samsung 860 EVO SSDs for storage. The 500D uses these removable SSD caddies to hold the SSD drives securely in position. They are not toolless and require 4 screws to hold them on the frame. Corsair provides 8 screws with the 500D, which is enough for 2 SSD units. It took only a few minutes to securely mount the SSD units to the 500D SSD caddies. I will be using a 2TB Western Digital Black HDD for more storage options. This is one of the two HDD caddies provided with the 500D. If you mount the HDD to the caddy using the 4 pins on the sides then the drive face will be facing inward and you will only see the back of the HDD unit. If you mount it to the 4 small screws located on the read of the caddy, then the front of the HDD unit will be facing outwards. For the front and rear fans I went with the Corsair LL120 RGB 120mm fans. I purchased a triple pack since it also comes with the Lighting Node Pro unit that will control all of the RGB lighting for this case. Here are all four 120mm fans with the included Lighting Node Pro and fan hub devices. I purchased the Corsair Commander Pro to control all of the fans and RGB lighting. This unit replaces the Lighting Node Pro and has connections for two USB 2.0 connections, 6 PWM fans, 4 temperature probes and 2 LED connections. I will be using one of the USB 2.0 ports for the AIO unit. All 6 fans will be connected to this device for power. The LED strip and RGB LED fan hub will be connected also. The Corsair RGB LED Pro Expansion Kit provides 4 LED strips. Each strip contains magnets for mounting, as well as an adhesive tape if the case is not metal. I love the features of the new Corsair H150i Pro AIO unit. The larger 360 radiator fills the front of the case perfectly and the newly design of the CPU housing is more streamlined. The CPU housing has RGB lighting so that if can match whatever color scheme you desire. This is the rear of the case with all the cabling connected and secured. You must remember that this area will be slightly visible through the smoked tempered glass right side panel. The numerous cable tie-downs and the metal cable channel cover are invaluable for providing clean cable management. You can see that the HDD has been mounted so that the label is facing outwards. The Commander Pro is mounted in the upper HDD area since I will only be using a single HDD. The fan RGB hub is mounted in the left-most SSD caddy position. This keeps it more to the center of the case since all the fan RGB wires must be connected here. The interior of the case with everything connected. All wires have been routed so as to provide a clean appearance. I love the clean all-black appearance of this case. The side tempered glass panels are deeply tinted to keep with the all-black color scheme. This is with the side panel partly open. The camera flash partly drowns out the blue lighting of the components. With the camera flash turned off, you can more readily see how the blue lighting compliments the black case. Here is a shot of my setup with all my Corsair peripherals. Did a quick hard drive test to see what speeds the various drives types are performing at... These are the results for the Samsung 960 EVO M.2 drives. You can see that the 1TB version performs about 17% faster than the 500GB model. The Samsung 860 EVO SSD drives are both almost identical in speeds and performance. The Western Digital Black HDD is not bad, but does not even come close to the speeds of the above. Good thing this drive will be used mainly for backups and storage. This is an external SATA drive connected via the USB 3.1 port. -
Monolithic 500D - Corsair Obsidian 500D Build Log
NavyChief replied to NavyChief's topic in Build Logs
Here is a shot of a stock empty Corsair Obsidian 500D case. I really love how the doors open outward and are held closed with magnets instead of screws. -
Over the years I have done several computer builds in both the Obsidian 800D and 900D full tower cases. I absolutely love the Corsair Obsidian design line in that they provide plenty of room for water cooling components and an almost limitless modding potential. The only downside to these cases would have to be their sheer size! These full-size cases easily weighed over 60 pounds when fully loaded. When I saw the announcement for the new Corsair Obsidian 500D mid-tower case, I knew that I wanted to get one for the upcoming QuakeCon 2018 LAN event. Here are the components for this build... Main Components: CSE: Corsair Obsidian 500D ATX Mid-Tower MBD: Gigabyte Z370 AORUS Gaming 7 ATX CPU: Intel i7-8700K Coffee Lake AIO: Corsair Hydro Series H150i PRO RGB MEM: Corsair Vengeance Blue LED DDR4 3000MHz 32GB (4x8GB) GPU: EVGA GeForce GTX 1080 Ti SC2 PSU: Corsair AX1200i Platinum Modular M.2: Samsung 960 EVO 500GB (Windows 10 Pro) M.2: Samsung 960 EVO 1TB (Games) SSD: Samsung 860 EVO 500GB SATA III (2) HDD: Western Digital Black 2TB FAN: Corsair LL120 RGB LED High Performance 120mm PWM (4) FAN: Corsair LL140 RGB LED High Performance 140mm PWM (2) RGB: Corsair Commander PRO RGB: Corsair Lighting Node PRO Peripherals: MON: ASUS ROG PG279Q 27" 165 Hz WQHD IPS, NVIDIA G-Sync Gaming Monitor KBD: Corsair K95 RGB PLATINUM Mechanical Gaming Keyboard - CHERRY MX Speed MSE: Corsair GLAIVE RGB Gaming Mouse - Aluminum MPD: Corsair MM800 RGB POLARIS Gaming Mouse Pad HST: Corsair VOID Wireless Dolby 7.1 RGB Gaming Headset HST: Corsair ST100 RGB Premium Headset Stand with 7.1 Surround Sound I will keep this build log updated as the assembly commences and it starts to take shape.
-
I did an interview with NVIDIA and it was just published. https://www.geforce.com/whats-new/articles/yidiy-gary-murphy-glorious-pcmr
-
The case has now been to Dreamhack Austin in May and QuakeCon in August. It has received a great reception and many people enjoyed the simplicity and clean interior. Here is a shot of my home setup. At QuakeCon 2017, a news photographer loved my build and put it an article for the Dallas Morning News. https://www.guidelive.com/geek/2017/08/25/four-day-video-game-party-quakecon-staying-going-get-bigger
-
Yes, the top panel lighting control buttons are no longer necessary. The Corsair Lighting Node Pro does control all the lighting via the Link software.
-
I did try and mount the radiator into the top but the width was too much. The radiator and fans were hitting the top of the Vengeance memory modules. If you have the half-height memory units then it may work, but the RGB versions are full-height. The front area was the only place that it would work.
-
One nice thing about the Corsair Lighting Node Pro is that it has even more control over the RGB lighting than that provided by the HD Lighting Control included with the fans and case. Since the lighting hub now goes directly to the lighting node pro, there is no need for these two components of the HD Lighting Control. Spent a few hours trying to do something with all of the typical wires that always end up behind the motherboard. Normally not too difficult a task when the side panel is solid, but with a glass side panel it becomes a major undertaking. Still need to groom a few cables, but the majority are in place and tied down. Here is a shot of the interior of the case.
-
The EVGA GeForce GTX 1080 Ti SC2 has arrived!!
-
Most of the main hardware (except for the GPU) have been mounted. Now the daunting task of figuring out all of this wiring and how to manage it in the most efficient manner since the side panel is tempered glass. Most of the cables shown are either data or control cables. The power cables (i.e. SATA, Molex, etc) aren't even in the picture.
-
This will be my first time with this type of lighting controller. Will post more information as I get it installed.
-
The SSD covers are dry and look pretty good in just the plain Sun Yellow color. Created some decals with the Silhouette Cameo to match the theme of the case, 'Glorious PCMR'. The black vinyl looks good on the yellow cases. Mounted on the case and ready for use! With the ASUS Maximus IX Hero motherboard having only a single USB 2.0 connection, I had to get a USB hub to expand that to 3 USB 2.0 ports. This device is made by NZXT. The package contains the USB Hub and the appropriate cables for connection to the motherboard. For lighting, this build will utilize the Corsair Lighting Node Pro.
-
Painted it yesterday. You can see in an earlier post when I mounted the front radiator part.
-
Alright, finally got the AIO CPU block installed. Fairly difficult to get the tubing to lay where I want it. Would rather have had it flipped over, but the tubing just would not cooperate. The black wires from the rear fan and the AIO still need to be groomed. Overview of case as it stands now. Now that the AIO is mounted, time to start getting the SSD drives ready. Here are the two Corsair Neutron Series XT drives (480GB each). Nice drives but that red color scheme will have to go. The decals removed easily enough and now that red really stands out! Removed the top covers (yep, voided that warranty) and now you can see what lies within these units. The covers are now getting a white primer coat and sun yellow coat. More updates when they are ready. Also received the 2TB Western Digital Black drive. Trying to decide what to do with it.
-
All of my previous builds had custom water cooling setups. I wanted this build to contain mostly off-the-shelf equipment that anyone can do without the large expense of custom water cooling components (i.e. pump, reservoir, water blocks, tubing, fittings). Mainly to show that even stock setups can look amazing with some planning and paint.

