Jump to content

Experiment Nr. 5 (Final pics on page 8)

p0Pe

Your pockets seem to be deep! Absolutely beautiful build!  :)

Sorry for the convoluted speech pattern.

Link to comment
Share on other sites

Link to post
Share on other sites

i bet you own that whole complex in the video don't you ^^ :D


You should see the underground lair :D


looks amazing so far!


Thanks man!


Your pockets seem to be deep! Absolutely beautiful build!  :)


They might be deep, but they are mostly empty:P

Link to comment
Share on other sites

Link to post
Share on other sites

subbed. i think we got a whole chunk of BOTW's subbing this log =D

Let us sacrifice at the altar of the almighty p0Pe! notworthy.gif

BUILD LOGS: HELIOS - Latest Update: 2015-SEP-06 ::: ZEUS - BOTW 2013-JUN-28 ::: APOLLO - Complete: 2014-MAY-10
OTHER STUFF: Cable Lacing Tutorial ::: What Is ZFS? ::: mincss Primer ::: LSI RAID Card Flashing Tutorial
FORUM INFO: Community Standards ::: The Moderating Team ::: 10TB+ Storage Showoff Topic

Link to comment
Share on other sites

Link to post
Share on other sites

mostly empty after building all these projects pffffffffffffffffffffff :D


Haha well. As long as I have money for food and rent, I am happy:P


just amazing,


you re the best modder i ever seen


i like all of your build/project


I am glad you think so:D I hope you like whats coming then:)


subbed. i think we got a whole chunk of BOTW's subbing this log =D


I recently went trough the thread about BOTW. There is a LOT of awesome builds there!


Let us sacrifice at the altar of the almighty p0Pe! notworthy.gif


Gonna need chocolate at that altar buddy:D


0_o This build is gonna be freaking amazing.


I sure hope so:)


all i can say is GG,

G fcking G


Thanks;)


Guys! I got the first video done of the pedestal! Be sure to like and subscribe if you like it, and.. erm.. want to subscribe :D
 
Link to comment
Share on other sites

Link to post
Share on other sites

Holy Gaben! If Snef says you're his favorite modder, you know you're amazing :D Mr. Pope for president!

i5 4670k| Asrock H81M-ITX| EVGA Nex 650g| WD Black 500Gb| H100 with SP120s| ASUS Matrix 7970 Platinum (just sold)| Patriot Venom 1600Mhz 8Gb| Bitfenix Prodigy. Build log in progress 

Build Log here: http://linustechtips.com/main/topic/119926-yin-yang-prodigy-update-2-26-14/

Link to comment
Share on other sites

Link to post
Share on other sites

Do you plan everything before starting, or just make it as it goes?


Cos your builds are just too flawless!

Link to comment
Share on other sites

Link to post
Share on other sites

Wow... just wow...  :wub:

CASE: FRACTAL DESIGN DEFINE R4  |  MOBO: MSI MPOWER Z77  |  CPU: Intel i5 3570k @ 4.4 GHz  |  CPU COOLER: NOCTUA NH-D15  |  GPU: EVGA GTX 770 SC |

PSU: CORSAIR AX860 W/ RED BRAIDED CABLES | SSD: SAMSUNG 840 EVO 250 GB | HDD: WD BLACK 1 TB | FANS: 3x NOCTUA NF-A14 | MONITOR: HP W2371D

KEYBOARD: CM STORM QFR MX BLUES W/  PBT KEYCAPS  |  MOUSE: LOGITECH G502 | MIC: AUDIO TECHNICA AT2020 | HEADPHONES: SENNHEISER HD 558

Link to comment
Share on other sites

Link to post
Share on other sites

BOTW winners unite! LOL


In mods we trust :D


wow that looks like it took a while to sand


A few hours:D 


Holy Gaben! If Snef says you're his favorite modder, you know you're amazing :D Mr. Pope for president!


Haha yeah, Snef most certainly knows his way around a CaseLabs case more than most!


Do you plan everything before starting, or just make it as it goes?


Cos your builds are just too flawless!


I mostly make it up as I go along. I normally start out by finding an interesting case, and then after all agreements on parts etc is made, I start the modding. That way I kinda force myself to be creative:D


Wow... just wow...  :wub:


Thanks man!


I have all the final renders of the case done, and will post them in an update soon! :)

Link to comment
Share on other sites

Link to post
Share on other sites

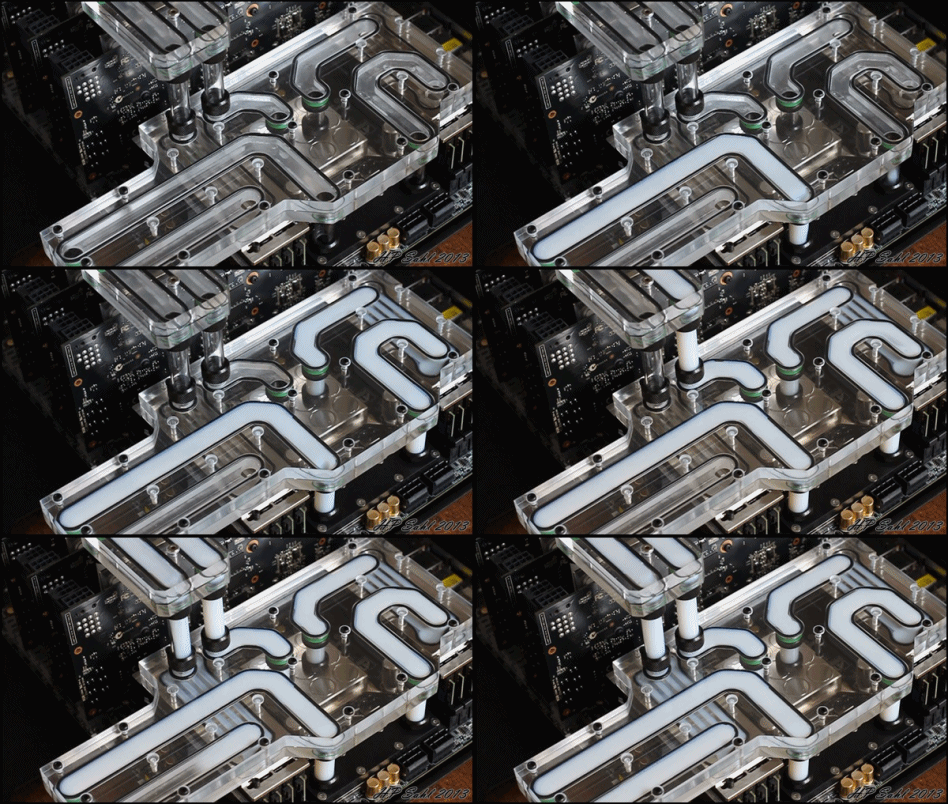
This is freakin awesome! Is the rotating gif in the original post the look you're going for?

If so, then holy shit LOL it looks incredible!

Link to comment
Share on other sites

Link to post
Share on other sites

This is freakin awesome! Is the rotating gif in the original post the look you're going for?

If so, then holy shit LOL it looks incredible!

It is, and you can see more in this update:


Now, with the pedestal watercooling semi donw, lets head on to the main event of this casemod.
The S3 case itself, and the panels I want to make for it. Since I wanted to make new external panels, I had to make a precise replica of the case in 3D so that I could model new sidepanels that would fit perfectly.
 
CaseLabs-S3-01.jpg
 
This is the final result of the model. Everything is as close to 1:1 as it gets, and is off by mostly 0.5 to 1 mm.
 
CaseLabs-S3-02.jpg
 
Close up of joints and bends.
 
CaseLabs-S3-03.jpg
 
My modified center panel. This was done to accommodate the harddrive mod done in a previous update.
 
CaseLabs-S3-04.jpg
 
Rear panel and old feets. The feets on the case has been swapped out with MNPC tech feets.
 
CaseLabs-S3-05.jpg
 
Motherboard tray. I did not draw the IQ plate holder.
 
CaseLabs-S3-06.jpg
 
And top with drop in insert.
 
CaseLabs-S3-07.jpg
 
Rear joints.
 
CaseLabs-S3-08.jpg
 
Left side
 
CaseLabs-S3-09.jpg
 
Right side
 
CaseLabs-S3-10.jpg
 
Top drop in insert panel.
 
CaseLabs-S3-11.jpg
 
And the bottom panel.
 
CaseLabs-S3-12.jpg
 
An idea I had to make some "special editions" with copper parts.
 
CaseLabs-S3-14.jpg
 
Or maybe even some acrylic.
 
CaseLabs-S3-15.jpg
 
Close up of copper motherboard tray. Neither of these will be used in this mod.
 
CaseLabs-S3-18.jpg
 
And the PSU compartment. Here you can also see where the wires from the harddrive mounted on the center panel is coming out.
 
CaseLabs-S3-19.jpg
 
And the main event. The panels I will try and get milled from billet 14 mm aluminum.
 
CaseLabs-S3-20.jpg
 
Under the case, there will be a lasercut 2 mm steel plate to keep these properly together. There will also be one on the rear of the case.
 
CaseLabs-S3-21.jpg
 
Left side render.
 
CaseLabs-S3-22.jpg
 
Right side render.
 
CaseLabs-S3-23.jpg
 
Top side.
 
CaseLabs-S3-24.jpg
 
The left side view into the motherboard compartment.
 
CaseLabs-S3-25.jpg
 
Rear panel again, where you can see the rear 2 mm steel plate that will hold the aluminum panels together.
 
CaseLabs-S3-26.jpg
 
Complete rear with white interior.
 
CaseLabs-S3-27.jpg
 
PSU hole, and a little view of the inner acrylic mounting.
 
CaseLabs-S3-28.jpg
 
Each acrylic piece is individually mounted in the aluminum, and will be milled so that it has the same shape as the panels themself.
 
CaseLabs-S3-29.jpg
 
Front render. I have made room in the front so that 2 120 mm fans can be mounted here to give some airflow in the case.
 
CaseLabs-S3-30.jpg
 
Left side with the left side panel taken off.
 
CaseLabs-S3-31.jpg
 
Closeup where you can see how the steel plates will keep the panels together.
 
CaseLabs-S3-32.jpg
 
Another shot with details of the side and top windows.
 
CaseLabs-S3-33.jpg
 
More mounting.
 
CaseLabs-S3-34.jpg
 
The front will naturally not have any acrylic in it as the holes are made for airflow. I might put some kind of filter on there, but that is undecided as of now.
 
CaseLabs-S3-35.jpg
 
Front render without front panel.
 
CaseLabs-S3-36.jpg
 
Closeup.
 
CaseLabs-S3-37.jpg
 
And another.
 
CaseLabs-S3-39.jpg
 
Thats it for now! Right now I am working on getting samples of the acrylic cut, which Justin from Parvum systems has agreed to help me on. Those guys knows their way around acrylic like no other, so I am sure they will make something nice :D
Link to comment
Share on other sites

Link to post
Share on other sites

Dear god it's beautiful. You're so creative with your builds and the picture quality is superb.

Link to comment
Share on other sites

Link to post
Share on other sites

Awesome ! Everytime I get a notification I get excited :) This thing gonna be heavy isn't it ? :D

My modded Air 540 build

Spoiler


Link to comment
Share on other sites

Link to post
Share on other sites

Amazing!


Solidworks i'm assuming? what do you use for your renders?


The parts are actually drawn in Autodesk Inventor. The renders is all done in Keyshot 4 :)


This is bloody INCREDIBLE!!! 


Thanks! :)


Dear god it's beautiful. You're so creative with your builds and the picture quality is superb.


Glad you like it mate:)


Awesome ! Everytime I get a notification I get excited :) This thing gonna be heavy isn't it ? :D


Well, according to my calculations in the 3D program the alu sides alone is going to weigh 5.5 kilo´s. So yeah, it might be a tad heavy for a mini itx build:D

Link to comment
Share on other sites

Link to post
Share on other sites

pls tell me you're doing these renders on project N.V xD


Haha Project N.V. would overheat if doing renders. It is only used as a glorious tax machine.


Not to pick, but in your renders you're using button head bolts.

Would it be nicer to countersink the material and use countersunk head bolts for a even plane? :)


I guess you are talking about these: http://tosed.dk/billeder/miniora/1/CaseLabs-S3-25.jpg


The alu strip is very thin, and would not be able to accomodate 3 mm countersunk bolts, which is why small button heads are used there.


And don't be afraid to write comments like that. It is good to have people point things out :)

Link to comment
Share on other sites

Link to post
Share on other sites

Create an account or sign in to comment

You need to be a member in order to leave a comment

Create an account

Sign up for a new account in our community. It's easy!

Register a new account

Sign in

Already have an account? Sign in here.

Sign In Now


×